Connection latency and timeouts
Learn about strategies to manage connection latencies and timeouts
Neon's Autosuspend feature ('scale to zero') is designed to minimize costs by automatically scaling a compute resource down to zero after a period of inactivity. By default, Neon scales a compute to zero after 5 minutes of inactivity. A characteristic of this feature is the concept of a "cold start". During this process, a compute transitions from an idle state to an active state to process requests. Currently, activating a Neon compute from an idle state takes anywhere from 500 ms to a few seconds not counting other factors that can add to latencies such as the physical distance between your application and database or startup times of other services that participate in your connection process.
Cold-start times are fastest in the US East (Ohio) — aws-us-east-2 region, which hosts the Neon Control Plane. The Neon Control plane will be deployed regionally in future Neon releases, bringing the same millesecond cold-start times to all supported regions.
note
Services you integrate with Neon may also have startup times, which can add to connection latencies. This topic does not address latencies of other vendors, but if your application connects to Neon via another service, remember to consider startup times for those services as well.
Check the status of a compute
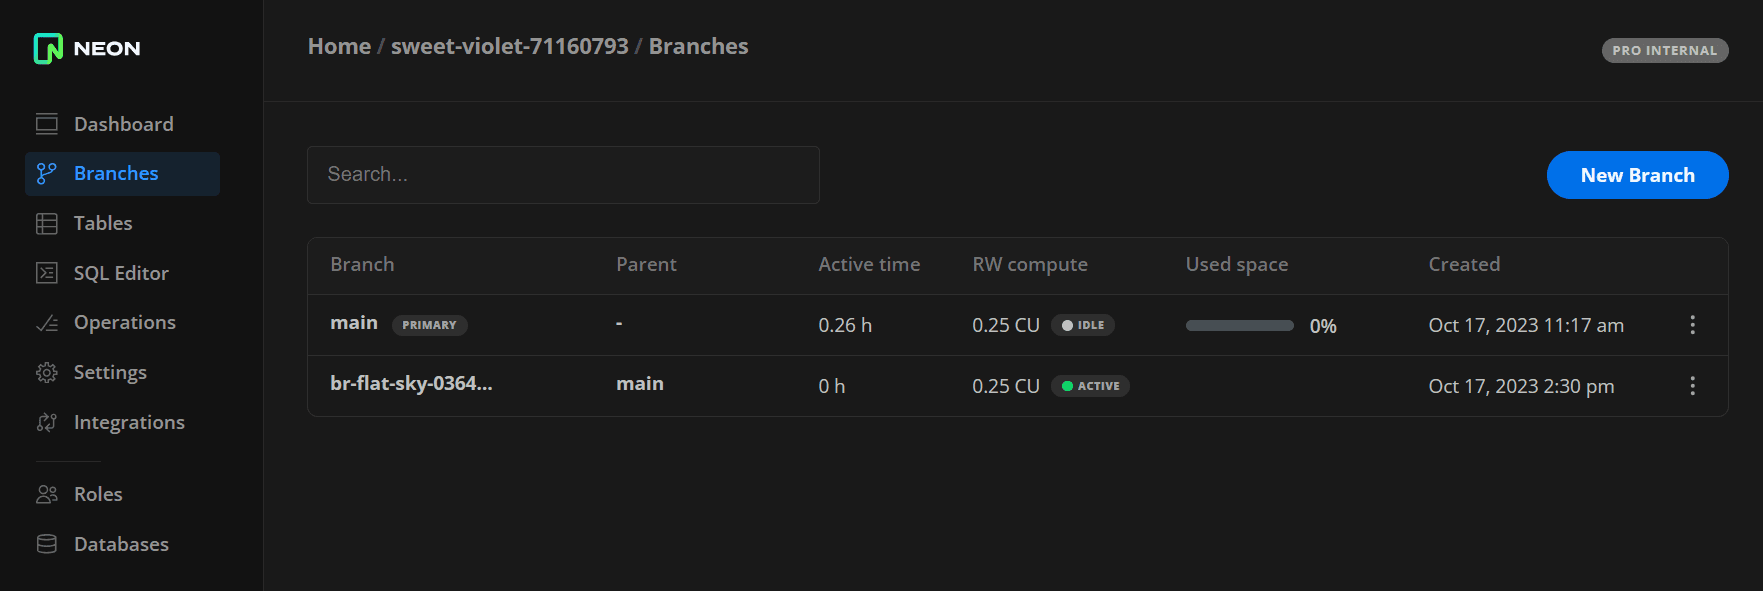
You can check the current status of a compute on the Branches page in the Neon Console. A compute will report either an Active or Idle status.

You can also view compute state transitions in the Branches widget on the Neon Dashboard.
User actions that activate an idle compute include connecting from a client such as psql, running a query on your database from the Neon SQL Editor, or accessing the compute via the Neon API.
info
The Neon API includes Start endpoint and Suspend endpoint APIs for the specific purpose of activating and suspending a compute.
You can try any of these methods and watch the status of your compute as it changes from an Idle to an Active state. By default, a compute is suspended after 300 seconds (5 minutes) of inactivity. Users on paid plans can configure this delay period, which is described later in this topic.
Strategies for managing latency and timeouts
Given the potential impact on application responsiveness, it's important to have strategies in place for managing connection latencies and timeouts. Here are some methods you can implement:
- Adjust your Autosuspend (scale to zero) configuration
- Place your application and database in the same region
- Increase your connection timeout
- Build connection timeout handling into your application
- Use application-level caching
Adjust your Autosuspend (scale to zero) configuration
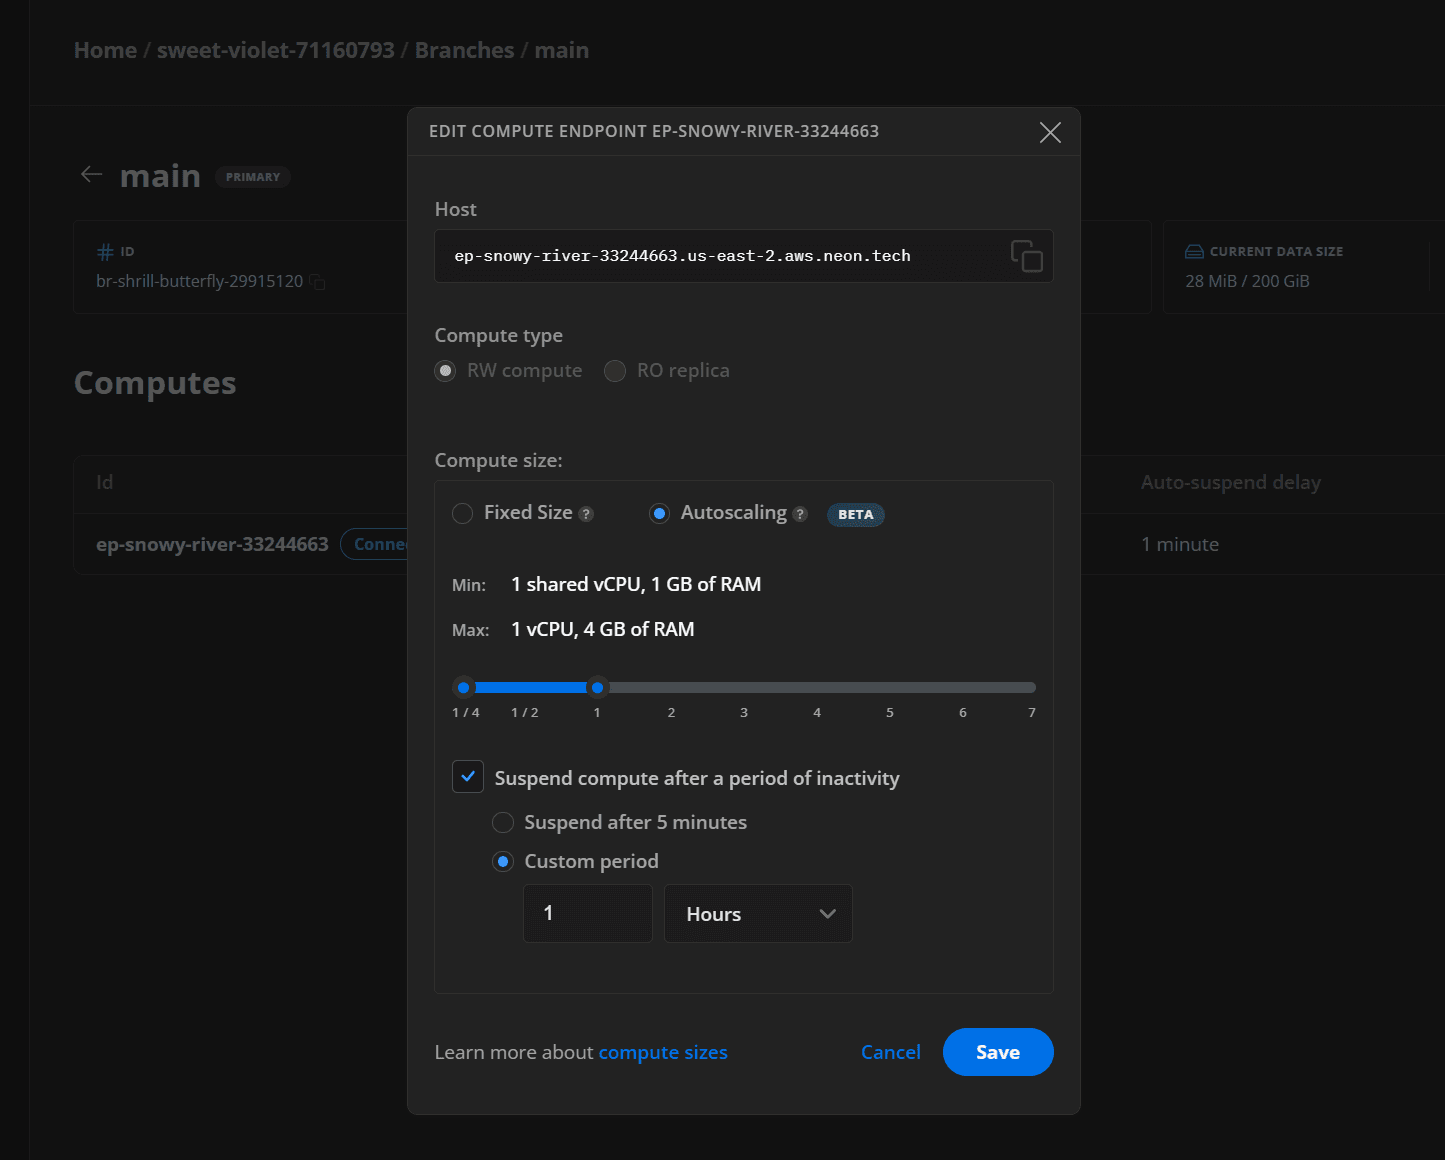
Users on paid plans can configure the length of time that the system remains in an inactive state before Neon scales your compute down to zero. This lets you set the balance between performance (never scaling down) and cost (scaling to zero at reasonable intervals). The Suspend compute after a period of inactivity setting is set to 5 minutes by default. You can disable autosuspend entirely or set a custom period up to a maximum of 7 days. Limiting or disabling autosuspend can eliminate or reduce startup times, but it also increases compute usage. For configuration instructions, see Edit a compute.
important
If you disable autosuspension entirely or your compute is never idle long enough to be automatically suspended, you will have to manually restart your compute to pick up the latest updates to Neon's compute images. Neon typically releases compute-related updates weekly. Not all releases contain critical updates, but a weekly compute restart is recommended to ensure that you do not miss anything important. For how to restart a compute, see Restart a compute.
Consider combining this strategy with Neon's Autoscaling feature, which allows you to run a compute with minimal resources and scale up on demand. For example, with autoscaling, you can configure a minimum compute size to reduce costs during off-peak times. In the image shown below, the Suspend compute after a period of inactivity is set to 1 hour so that your compute only suspends after an hour of inactivity, and autoscaling is configured with the 1/4 minimum compute size to keep costs low during periods of inactivity or light usage.

For autoscaling configuration instructions, see Compute size and autoscaling configuration.
Place your application and database in the same region
A key strategy for reducing connection latency is ensuring that your application and database are hosted in the same region, or as close as possible, geographically. For the regions supported by Neon, see Regions. For information about moving your database to a different region, see Import data from another Neon project.
Increase your connection timeout
By configuring longer connection timeout durations, your application has more time to accommodate cold starts and other factors that contribute to latency.
Connection timeout settings are typically configured in your application or the database client library you're using, and the specific way to do it depends on the language or framework you're using.
Here are examples of how to increase connection timeout settings in a few common programming languages and frameworks:
const { Pool } = require('pg');

const pool = new Pool({
  connectionString: process.env.DATABASE_URL,
  connectionTimeoutMillis: 10000, // connection timeout in milliseconds
  idleTimeoutMillis: 10000, // idle timeout in milliseconds
});
note
If you are using Prisma Client, your timeout issue could be related to Prisma's connection pool configuration. The Prisma Client query engine instantiates its own connection pool when it opens a first connection to the database. If you encounter a Timed out fetching a new connection from the connection pool error, refer to Prisma connection pool timeouts for information about configuring your Prisma connection pool size and pool timeout settings.
Remember that increasing connection timeout settings might impact the responsiveness of your application, and users could end up waiting longer for their requests to be processed. Always test and monitor your application's performance when making changes like these.
Build connection timeout handling into your application
You can prepare your application to handle connection timeouts when latency is unavoidable. This might involve using retries with exponential backoff. This Javascript example connects to the database using the pg library and uses the node-retry library to handle connection retries with an exponential backoff. The general logic can be easily translated into other languages.
require('dotenv').config();
var Client = require('pg').Client;
var retry = require('retry');

// Connection string from .env file
var connectionString = process.env.DATABASE_URL;

function connectWithRetry() {
  var operation = retry.operation({
    retries: 5, // number of retries before giving up
    minTimeout: 4000, // minimum time between retries in milliseconds
    randomize: true, // adds randomness to timeouts to prevent retries from overwhelming the server
  });

  operation.attempt(function (currentAttempt) {
    var client = new Client({ connectionString });

    client
      .connect()
      .then(function () {
        console.log('Connected to the database');

        // Perform your operations with the client
        // For example, let's run a simple SELECT query
        return client.query('SELECT NOW()');
      })
      .then(function (res) {
        console.log(res.rows[0]);

        return client.end();
      })
      .catch(function (err) {
        if (operation.retry(err)) {
          console.warn(`Failed to connect on attempt ${currentAttempt}, retrying...`);
        } else {
          console.error('Failed to connect to the database after multiple attempts:', err);
        }
      });
  });
}

// Usage
connectWithRetry();
In the example above, the operation.attempt function initiates the connection logic. If the connection fails (i.e., client.connect() returns a rejected Promise), the error is passed to operation.retry(err). If there are retries left, the retry function schedules another attempt with a delay based on the parameters defined in the retry.operation. The delay between retries is controlled by the minTimeout and randomize options.
The randomize option adds a degree of randomness to the delay to prevent a large number of retries from potentially overwhelming the server. The minTimeout option defines the minimum time between retries in milliseconds.
However, this example is a simplification. In a production application, you might want to use a more sophisticated strategy. For example, you could initially attempt to reconnect quickly in the event of a transient network issue, then fall back to slower retries if the problem persists.
Use application-level caching
Implement a caching system like Redis or PolyScale to store frequently accessed data, which can be rapidly served to users. This approach can help reduce occurrences of latency, but only if the data requested is available in the cache. Challenges with this strategy include cache invalidation due to frequently changing data, and cache misses when queries request uncached data. This strategy will not avoid latency entirely, but you may be able to combine it with other strategies to improve application responsiveness overall.
Conclusion
With the right strategies, you can optimize your system to handle connection latencies and timeouts, ensuring your application delivers a consistently high level of performance. The best solution often involves a combination of strategies, so experiment and find the right configuration for your specific use case.
Last updated on